Guides & Tutorials
Creating a blog with Middleman and Netlify CMS
I am a believer that you can’t build a ship while sailing it, which is why it is my opinion that building a blog from scratch takes away from actually writing blog posts. Thanks to Site Generators you can get a decent looking blog up with the focus being on creating content.
Static site generators like Hugo and Jekyll provide a streamlined solution where you can add a styled themed with low effort.
Getting started is always the easy part, but staying consistent is where most aspiring bloggers fall short. At Netlify we sought out to help solve this with an open source solution and it's the Netlify CMS.
Regardless of your choice in site generator, you can use Netlify CMS and it only requires a few steps to set up. I will walk through getting this set up on my personal blog, which was created using Middleman.
Setup
You first need to create an admin folder in my public folder, which for Middleman is called source. In this folder, I copied the following content a new index.html file.
<!doctype html>
<html>
<head>
  <meta charset="utf-8" />
  <meta name="viewport" content="width=device-width, initial-scale=1.0" />

  <title>Content Manager</title>
  <!-- Include the stylesheets from your site here -->
  <link rel="stylesheet" href="https://unpkg.com/netlify-cms@^0.1/dist/cms.css" />
  <!-- Include a CMS specific stylesheet here -->

</head>
<body>
  <script src="https://unpkg.com/netlify-cms@^0.3.4/dist/cms.js"></script>
</body>
</html>
This index.html is also available in the CMS's README. You will also need a config.yml in the same folder. I have updated my folder location to source posts, which is the location of all my blog content. I original set this folder in my middleman config as the blog.prefix in my config.rb.
backend:
  name: github
  repo: owner/repo # Path to your GitHub repository
  branch: master # Branch to update (master by default)

media_folder: "img/uploads" # Folder where user uploaded files should go

collections: # A list of collections the CMS should be able to edit
  - name: "post" # Used in routes, ie.: /admin/collections/:slug/edit
    label: "Post" # Used in the UI, ie.: "New Post"
    folder: "source/posts" # The path to the folder where the documents are stored
    create: true # Allow users to create new documents in this collection
    fields: # The fields each document in this collection have
      - {label: "Title", name: "title", widget: "string", tagname: "h1"}
      - {label: "Body", name: "body", widget: "markdown"}
      - {label: "Foo", name: "foo", widget: "foo"}
      - {label: "Publish Date", name: "date", widget: "datetime"}
Connecting GitHub as a backend and authenticator
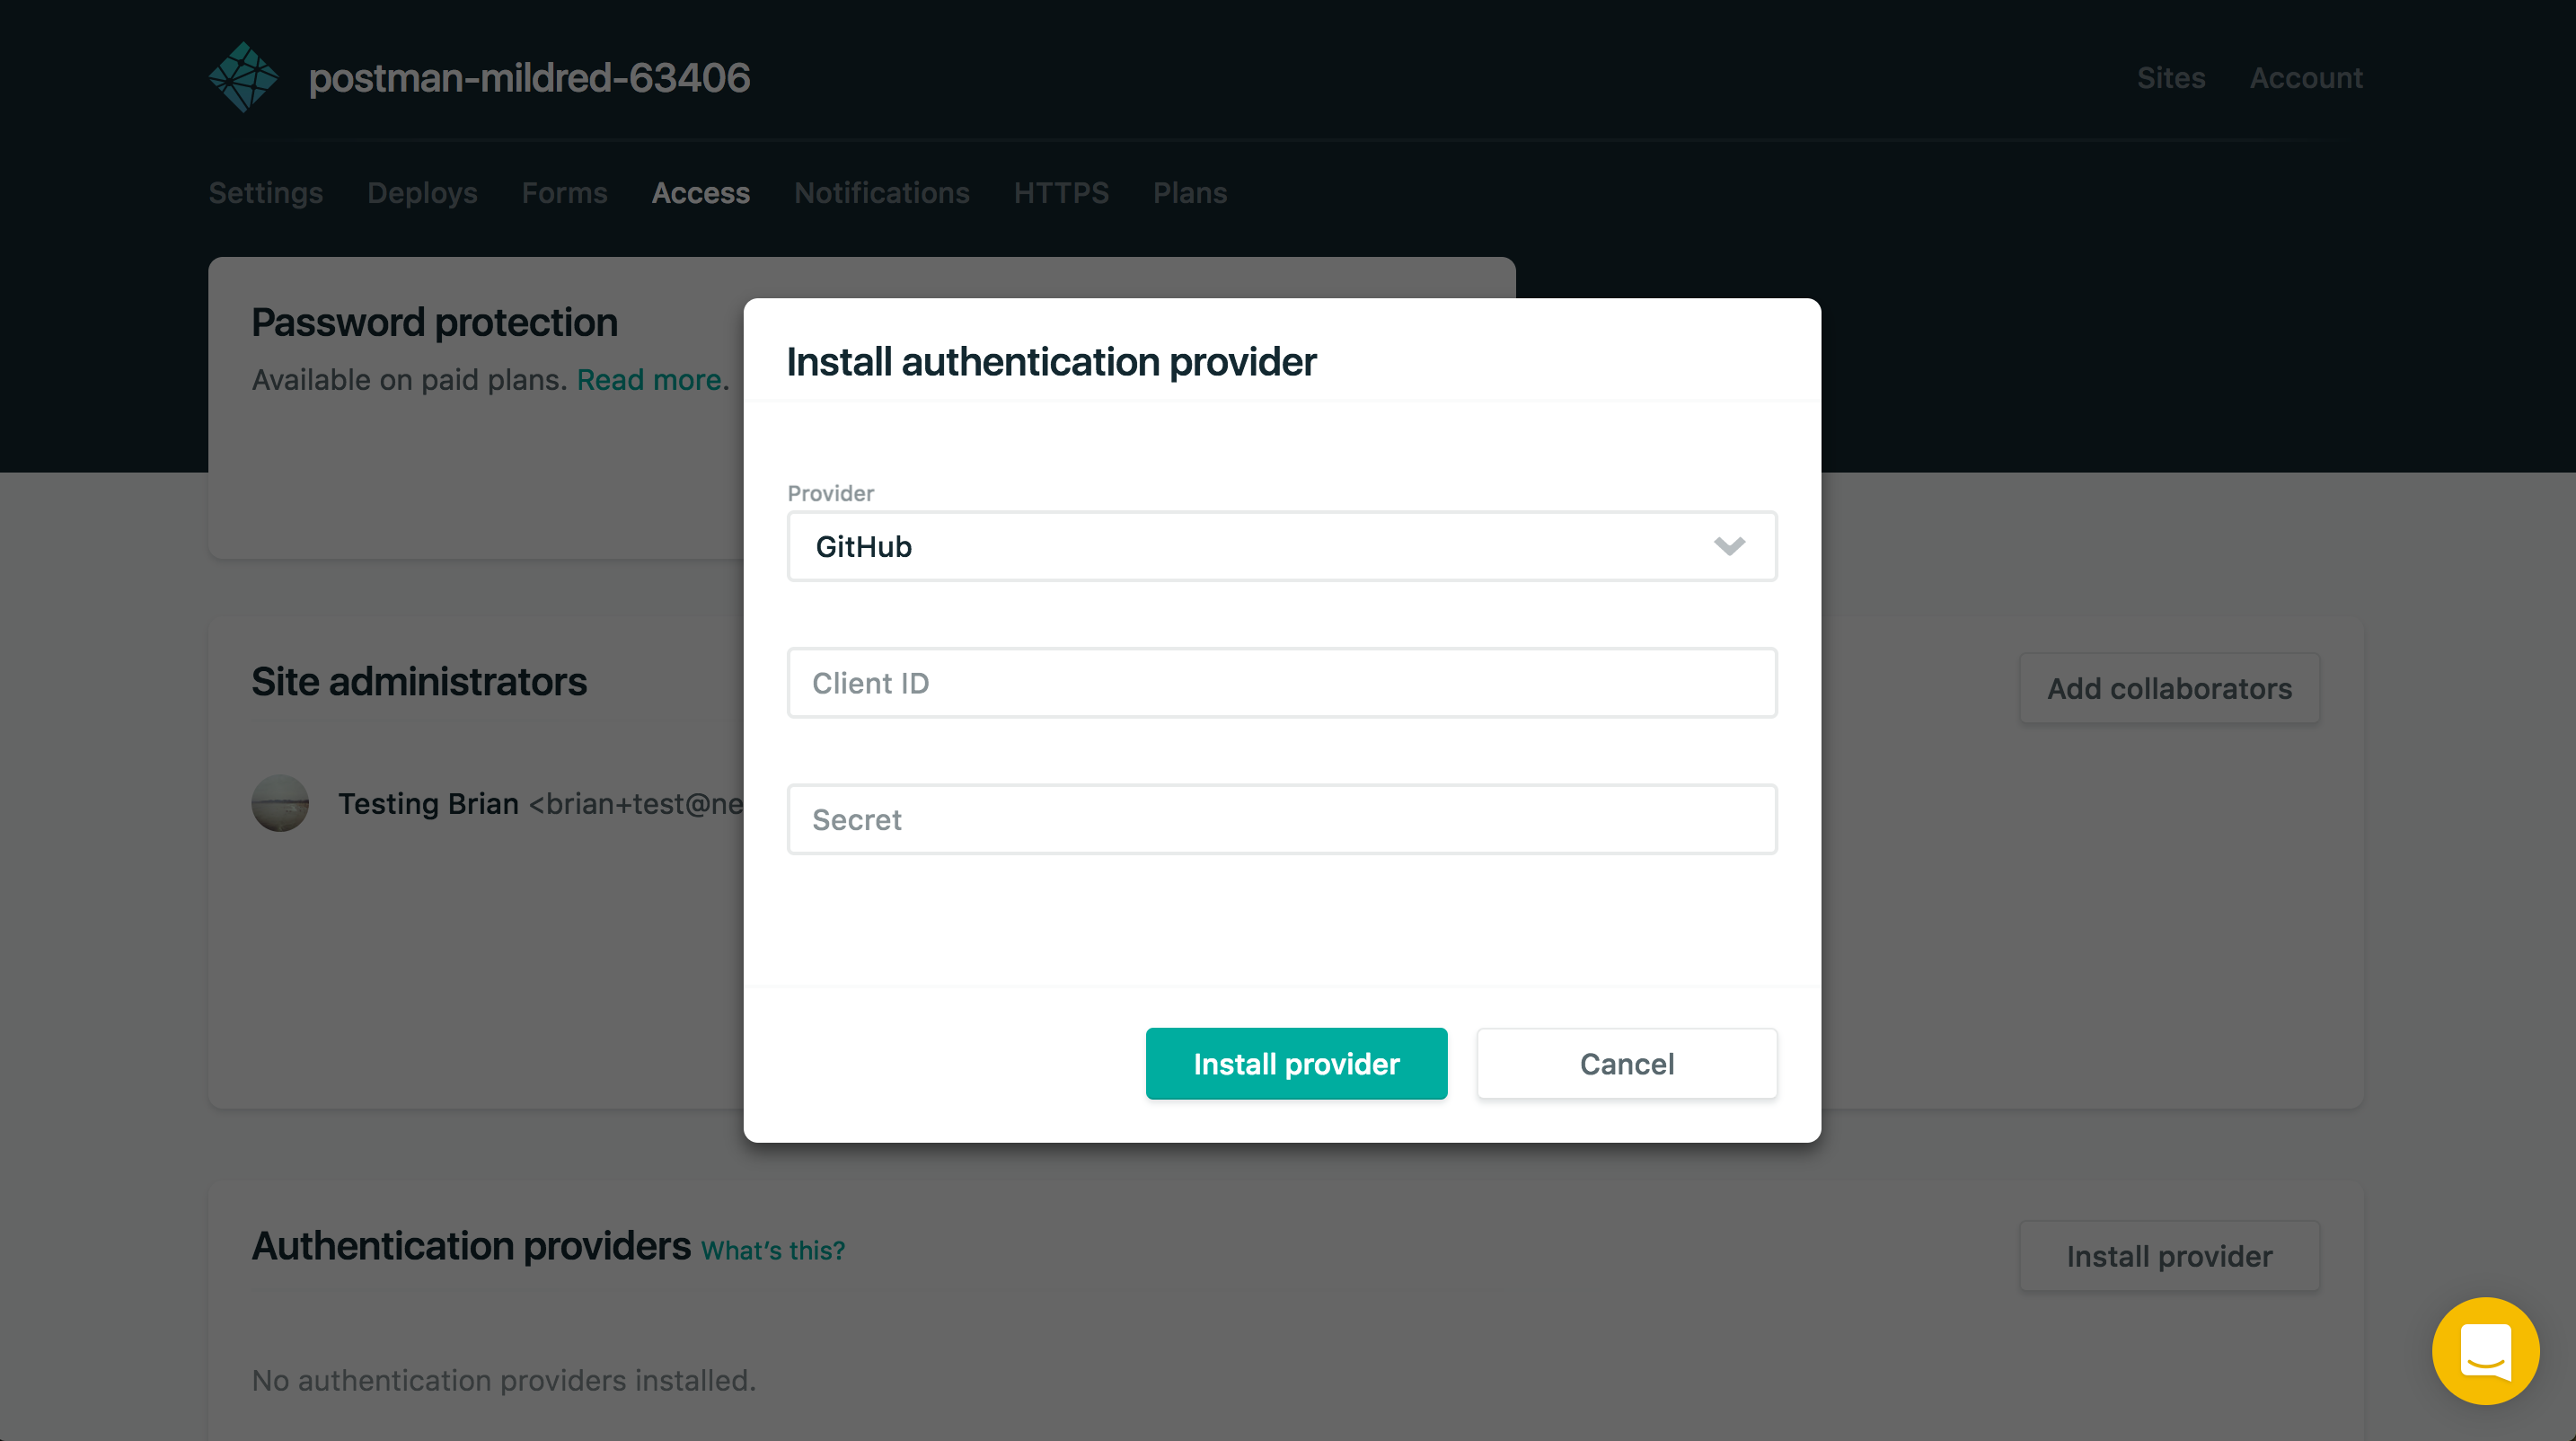
The power of the CMS comes from using GitHub as your backend, which is the default git-based authenticator and integrates with Netlify's Authentication Provider feature. This means that the CMS integrates directly with GitHub's API for updating and save posts. To get everything connected for continuous deployment from GitHub to Netlify follow this documentation to create a GitHub Oauth application.
Then go to the Access tab for your Netlify site and configure the GitHub provider with your new Client ID and Client Secret.
That completes the set up process, now you should be able to go to the /admin section of your site and log in.
Create a post with the CMS
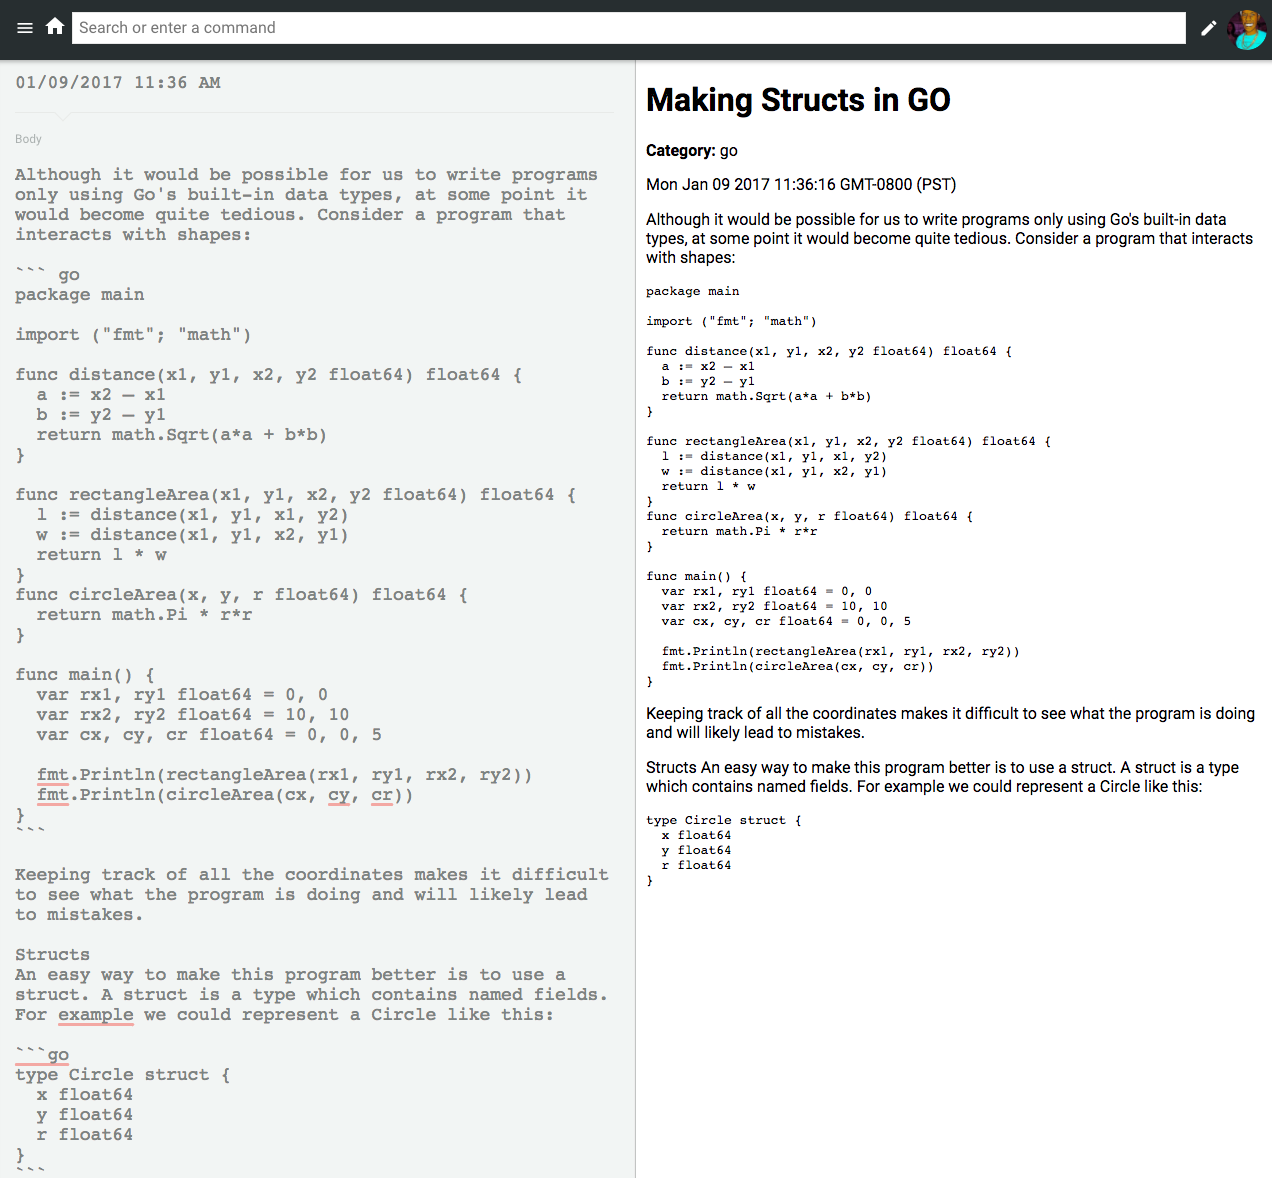
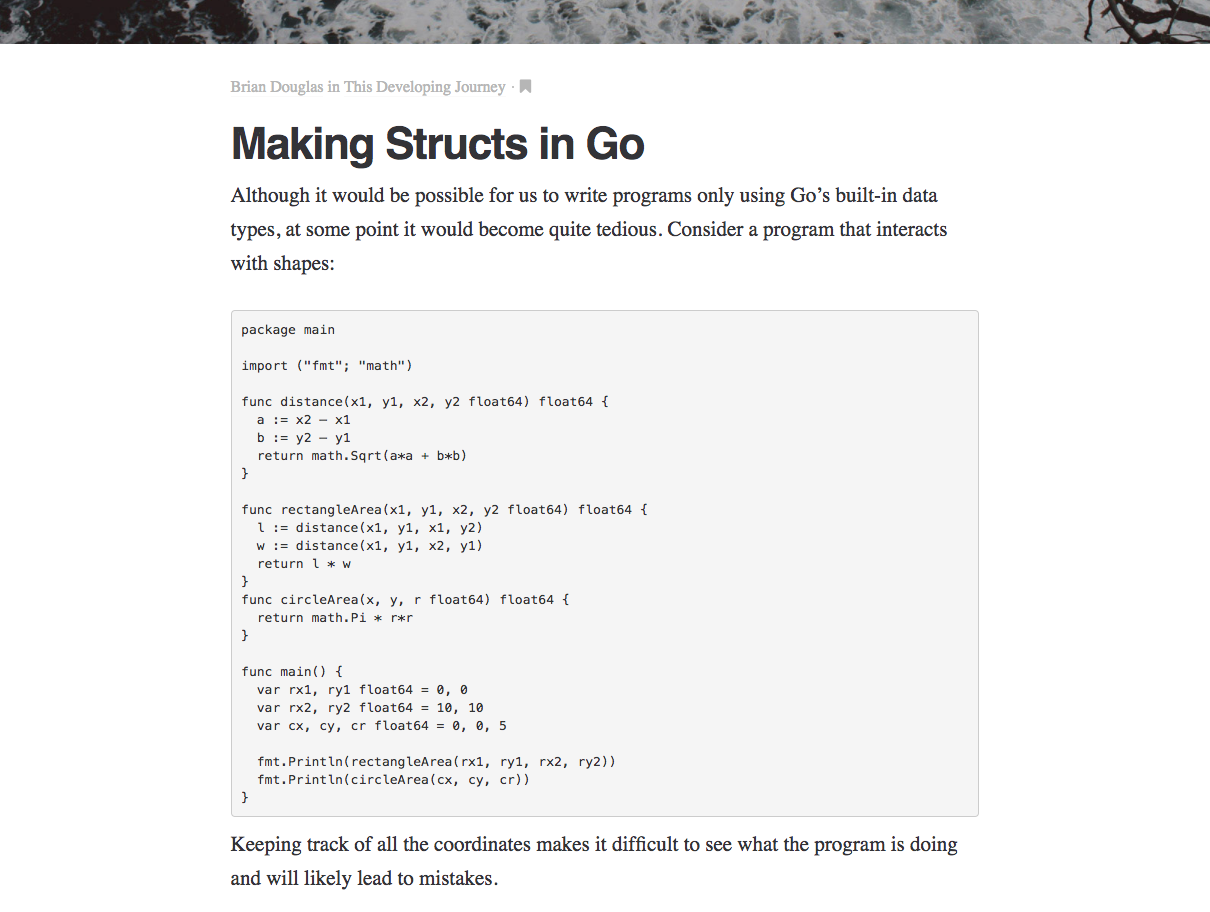
Now that you can view the CMS, you can create, edit and update posts via your web browser. Start drafting a post by selecting the ✎ pencil in the menu bar.
Each time you save a post, a GitHub commit will be made to the branch you selected in your config.yml. This could be ideal, but some posts might take more time, so I recommended adding a draft flag to the admin/config.yml. Middleman checks for drafts by using the published flag.
 collections: # A list of collections the CMS should be able to edit
        ...
        fields: # The fields each document in this collection have
          - {label: "Draft", name: "published", widget: "hidden", default: "false"}
          ...
Now you can begin publishing directly to your blog's repo without the need to constantly push and pull the latest changes. Feel free to review my blogs CMS admin setup to reference with your setup here.
And More
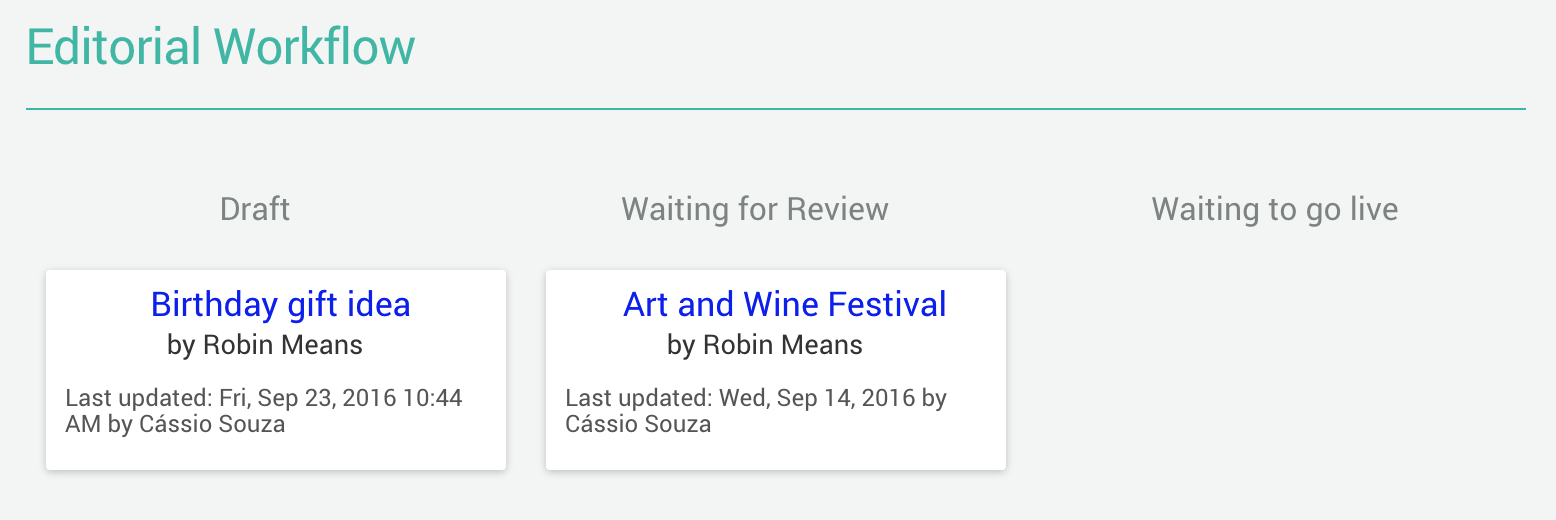
There are quite a few other things you can do with Netlify CMS. I encourage you to check out the repository's documentation to find how to set up an editorial workflow that not only opens a new branch for you, but also creates a Pull Request to view the content changes and preview on a deploy preview.
We are hard at work on this open source tool, let us know in the netlify-cms repository if there are any issues or if you have any feature requests. Pull requests are of course always welcomed!


