Guides & Tutorials
A Great, Fast Static E-Commerce Experience with 6 Easy Tools
Charles is a co-founder and lead engineer at Snipcart, a solution empowering developers to turn any website into a customizable e-commerce platform. He likes code, scotch, and colourful socks. You can follow him on Twitter.
The popularity of developer-oriented flat-file CMS and static site generators has been rocketing for the last two or three years. A growing, dynamic (see what I did there?) community of developers is embracing the static movement. And they've got good reasons to do so. Static sites are faster, cheaper and safer than their dynamic counterparts.
The upper hand dynamic sites used to have was mostly due to their heavy feature-set. Back in the days, static sites couldn't offer many dynamic features and useful add-ons. But those days are gone. Using the right widgets and plugins, developers can now create amazing web experiences with static sites today. And that's exactly what we'll prove in this post.
Today, we're going to show you how to create a fast, effective static e-commerce website by leveraging the right set of dynamic plugins and powerful static tools.
More specifically, we're going to harness the power of Hugo, Disqus, Google Analytics, MailChimp, Snipcart and Netlify into one effective experience for both merchants and customers.
So let's do it.
Step 1: Create your Hugo website
We recently played a bit with Hugo ourselves at Snipcart. It's an increasingly popular open source static site generator, and there's a reason behind its rise to fame: it's incredibly fast and easy to use. Our friends at Netlify also wrote about it a few weeks ago. Running on Go, written by Gopher Steve Francia, it boasts awesome features and offers incomparable performance. You can learn more about it here.
Quick how-to
You must start by installing Hugo. Refer to this part of their documentation to do so.
Now open a terminal, go to your new website root, and run the following command:
hugo new site
Hugo will then generate the basic tree. We won't go too deep into all the features Hugo offers. Their documentation is very complete and you should start by going through it to get the basics and get an idea of how far you can take it.
Step 2: Plug in Disqus
Now that our static site is up and running with Hugo, we'll start with an easy but important tool integration: Disqus. Most e-commerce merchants nowadays know the power of content marketing and blogging. So for this step, we assume you'll have a blog. And if you do have a blog, well, you kind of need to let people comment your posts to foster interactions, right?
Quick how-to
This step is going to be pretty obvious: integrating Disqus is as easy as integrating Snipcart. You simply need to insert a small code snippet in the appropriate pages. It shoud look like this:
<div id="disqus_thread"></div>
<script type="text/javascript">
    /* * * CONFIGURATION VARIABLES: EDIT BEFORE PASTING INTO YOUR WEBPAGE * * */
    var disqus_shortname = '<example>'; // Required - Replace '<example>' with your forum shortname

    /* * * DON'T EDIT BELOW THIS LINE * * */
    (function() {
        var dsq = document.createElement('script'); dsq.type = 'text/javascript'; dsq.async = true;
        dsq.src = '//' + disqus_shortname + '.disqus.com/embed.js';
        (document.getElementsByTagName('head')[0] || document.getElementsByTagName('body')[0]).appendChild(dsq);
    })();
</script>
<noscript>Please enable JavaScript to view the <a href="https://disqus.com/?ref_noscript">comments powered by Disqus.</a></noscript>
We suggest you take a look at their documentation about Web Integration, which is very complete.
Step 3: Track your metrics with Google Analytics
We won't give you a crash course on why Google Analytics is important for your e-commerce site. Analyzing your audience's specifics and behavior, tracking your sales and conversion rates, and measuring the impact of your campaigns are just a few reasons justifying its usage. Also, it's free. :)
Important notice: in Step 5, we show you how to set up your Snipcart shop on your site. Once this is done, we encourage you to take a look at this blog post. It explains how to enable Google Analytics E-Commerce Tracking with a Snipcart website.
Quick how-to
Just like Disqus and Snipcart, integrating Google Analytics comes down to including a snippet of code on all your pages. We suggest you to include it in your layout page to make sure it is included in all the pages of your site. This way, you will be able to track all the relevant activity and page views on your site.
The code snippet you need to integrate should like like this:
<script>
(function(i,s,o,g,r,a,m){i['GoogleAnalyticsObject']=r;i[r]=i[r]||function(){
(i[r].q=i[r].q||[]).push(arguments)},i[r].l=1*new Date();a=s.createElement(o),
m=s.getElementsByTagName(o)[0];a.async=1;a.src=g;m.parentNode.insertBefore(a,m)
})(window,document,'script','//www.google-analytics.com/analytics.js','ga');

ga('create', 'UA-XXXX-Y', 'auto');
ga('send', 'pageview');
</script>
Replace UA-XXXX-Y by your own tracking code. Again, we suggest you take a look at Google's documentation to learn more about tracking and configuration with GA.
Step 4: Set up your email marketing with MailChimp
Collecting customers emails is a must for every e-commerce business out there. It'll allow you to send them newsletters, seasonal offers, cart reminders, exclusive discounts, helpful content and more. And, well, MailChimp's famous little monkey is pretty much the go-to guy for email marketing these days. The platform is easy, intuitive, beautiful, and their support is out of this world. It's even free for a while, as you start building your email list.
Quick how-to
First step: sign up for MailChimp if you haven't done it already.
Then, create a list in your MailChimp dashboard. Open the new list and click on the Signup forms tab. Personally, we chose to use the basic Embedded forms option: it allows you to generate a form that can be integrated directly within your website. Users will then be able to subscribe to your mailing list simply by filling up the form.
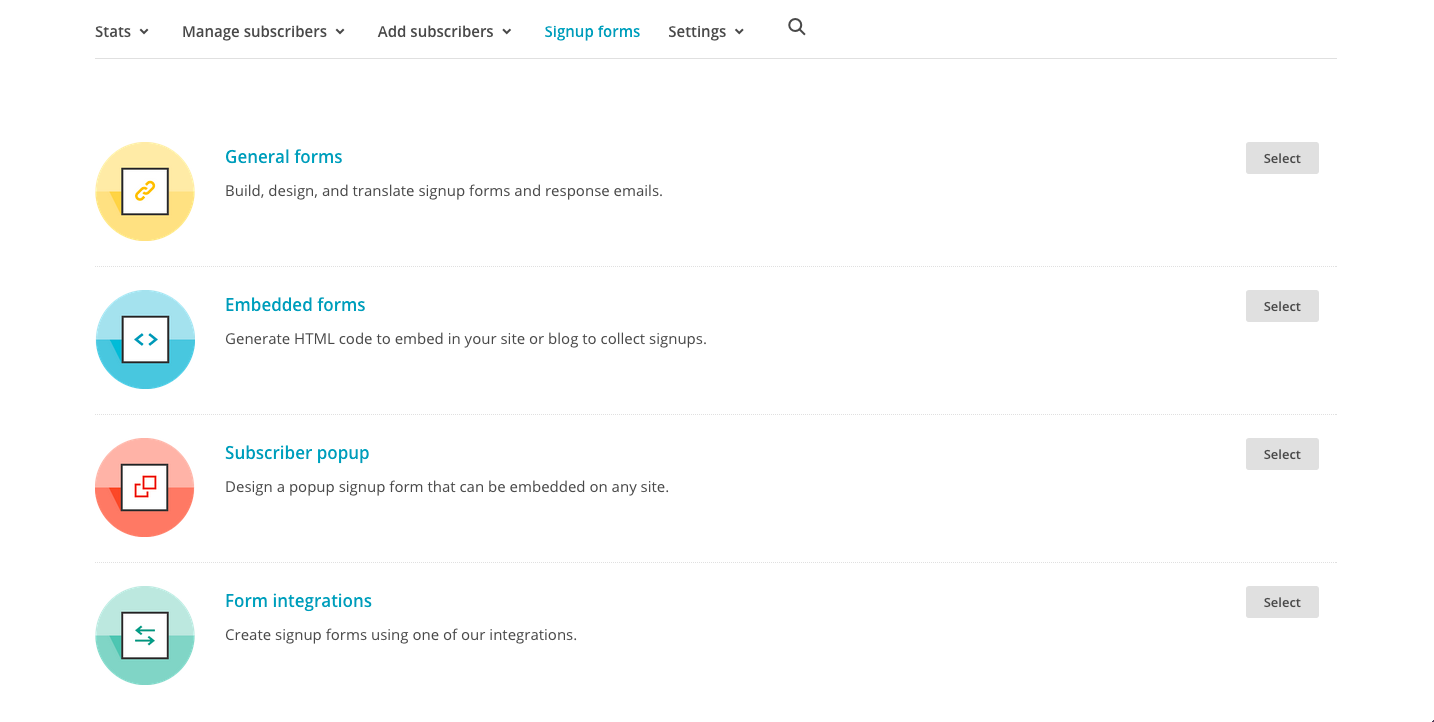
You also could use the popup integration or any of the other ones available in the Signup forms section. Choose the one that fits the best for your specific needs.
Step 5: Start selling products with Snipcart
Most e-commerce solutions, whether they're CMS plugins or turnkey CMS solutions themselves, require heavy databases to create and manage products. Snipcart, on the other hand, allows developers to set up e-commerce on any kind of website. Why? Because it works with a simple JavaScript inclusion and basic HTML product definition. In other words, your cart and products are handled directly in your website's HTML. This makes for an awesome fit with static websites, as you might have guessed.
Quick how-to
Adding our HTML/JS shopping cart to your static Hugo website mostly consists of two straightforward steps: creating data files and appropriate product templates.
Since this post is already 6 steps long, we won't be covering the whole Snipcart/Hugo integration right here. When you're ready to integrate Snipcart to your static Hugo site, we invite you to read our how-to demo directly on our blog:
Static Site E-Commerce (part 3): Integrating Snipcart with Hugo
Step 6: Deploy on Netlify and become a millionaire
Okay, it might not be that easy. But the deploying part will be that easy. Our friends at Netlify have made deploying and hosting static sites really simple and quick. It's a high-performing solution, and it's frankly the most effective way we found to power static websites and apps. Now let's see how it works when it comes to deploying our static e-commerce site.
Quick how-to
Simply create a new site in Netlify's dashboard. In our post about integrating Snipcart with Hugo, we suggest you to link your site repository directly to Netlify. This is the easiest way to do it. You can either use GitHub or Bitbucket for that. Once your site is linked, fill the setup form like this:
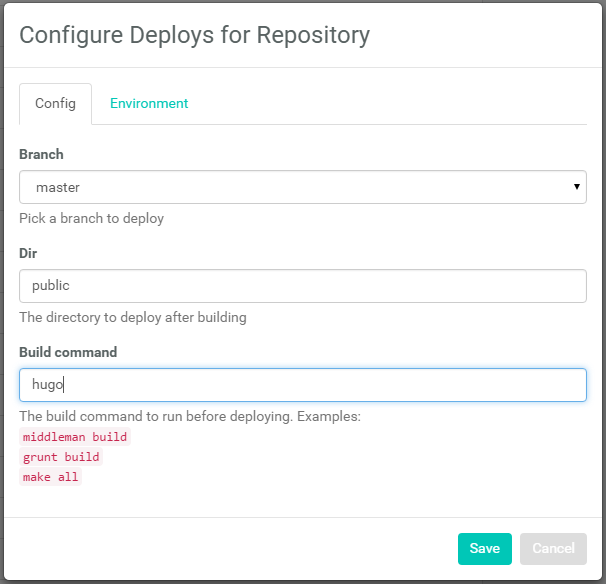
Netlify will then automatically build your website, and it should be up and running in a matter of seconds.
Conclusion
So let's wrap things up a bit now, shall we? Here's what following the steps highlighted in this post will allow you to do on your e-commerce static website:
-
With Hugo, you can build, manage and update your static site in a flash.
-
With Disqus, you can enable comments on your posts to foster interactions with your site visitors/customers.
-
With Google Analytics, you can analyze audience specifics, track conversions & sales, and measure campaigns ROI.
-
With MailChimp, you can collect customers emails and improve sales & retention with targeted email campaigns.
-
With Snipcart, you can sell any product directly on your static website in an optimized, on-site checkout process.
-
With Netlify, you can easily build, deploy and host your static e-commerce store.
With these 6 tools, you can build a great, fast static e-commerce experience.
We'd like to thank Christian and Mathias for letting us publish this guest post on the Netlify blog. We do love discussing static web development, so feel free to hit the comments if you have any thoughts, questions or suggestions. You can also follow us on Twitter and on our blog. And if you've enjoyed this post, please, take a second to share it on Twitter


